
Description: Sellers leads come through any Home Valuation form or seller's page that you have set up on your website. You can control what happens to that lead as it comes in, set up appropriate lead routing rules, add tags, set filters, and simulation the lead to make sure everything is working as you expect.
Related articles:
- Log into the website you are an Admin of
- Navigate to FlexCRM -> Lead Routing

- Scroll down to the second section on the Leads Channel page which is called Seller Leads
- This channel pertains to any leads coming in through a selling related page such as the Home Valuation page
- The first option is for en email notification when a new lead comes in. We recommend having this box checked.
- Note that if the lead is assigned to an agent, they will ALSO receive an email notification if this box is checked
- The second option is to be notified by text and this is not activated by default. We recommend having this box checked as well so you will be doubly notified when a new seller lead comes in.
- Note that if the lead is assigned to an agent, they will ALSO receive a text notification if this box is checked
- Creating a client account is recommended for all Seller Leads so they can be added to a CRM, tagged, and potentially started on a drip campaign immediately
- Agent Assignment is revealed when the Create Client Account box is checked. You can use these options to select the type of agent assignment pattern for leads to follow as they come in through this channel. We recommend either the Admin Agent option or the Advanced Routing.
- Admin Agent = the admin of the website will receive all agents and can then disperse them
- Advanced Routing = the rules of the Advanced Routing tab will be followed
- Random Agent = A random agent in the group will receive the client
- No Agent = The client will be set as Unassigned in the system
- You can enable a Zapier automation to occur when a new lead comes in through this channel. This is a more advanced option and is not necessary unless you want to dive into automating your platform via Zapier.
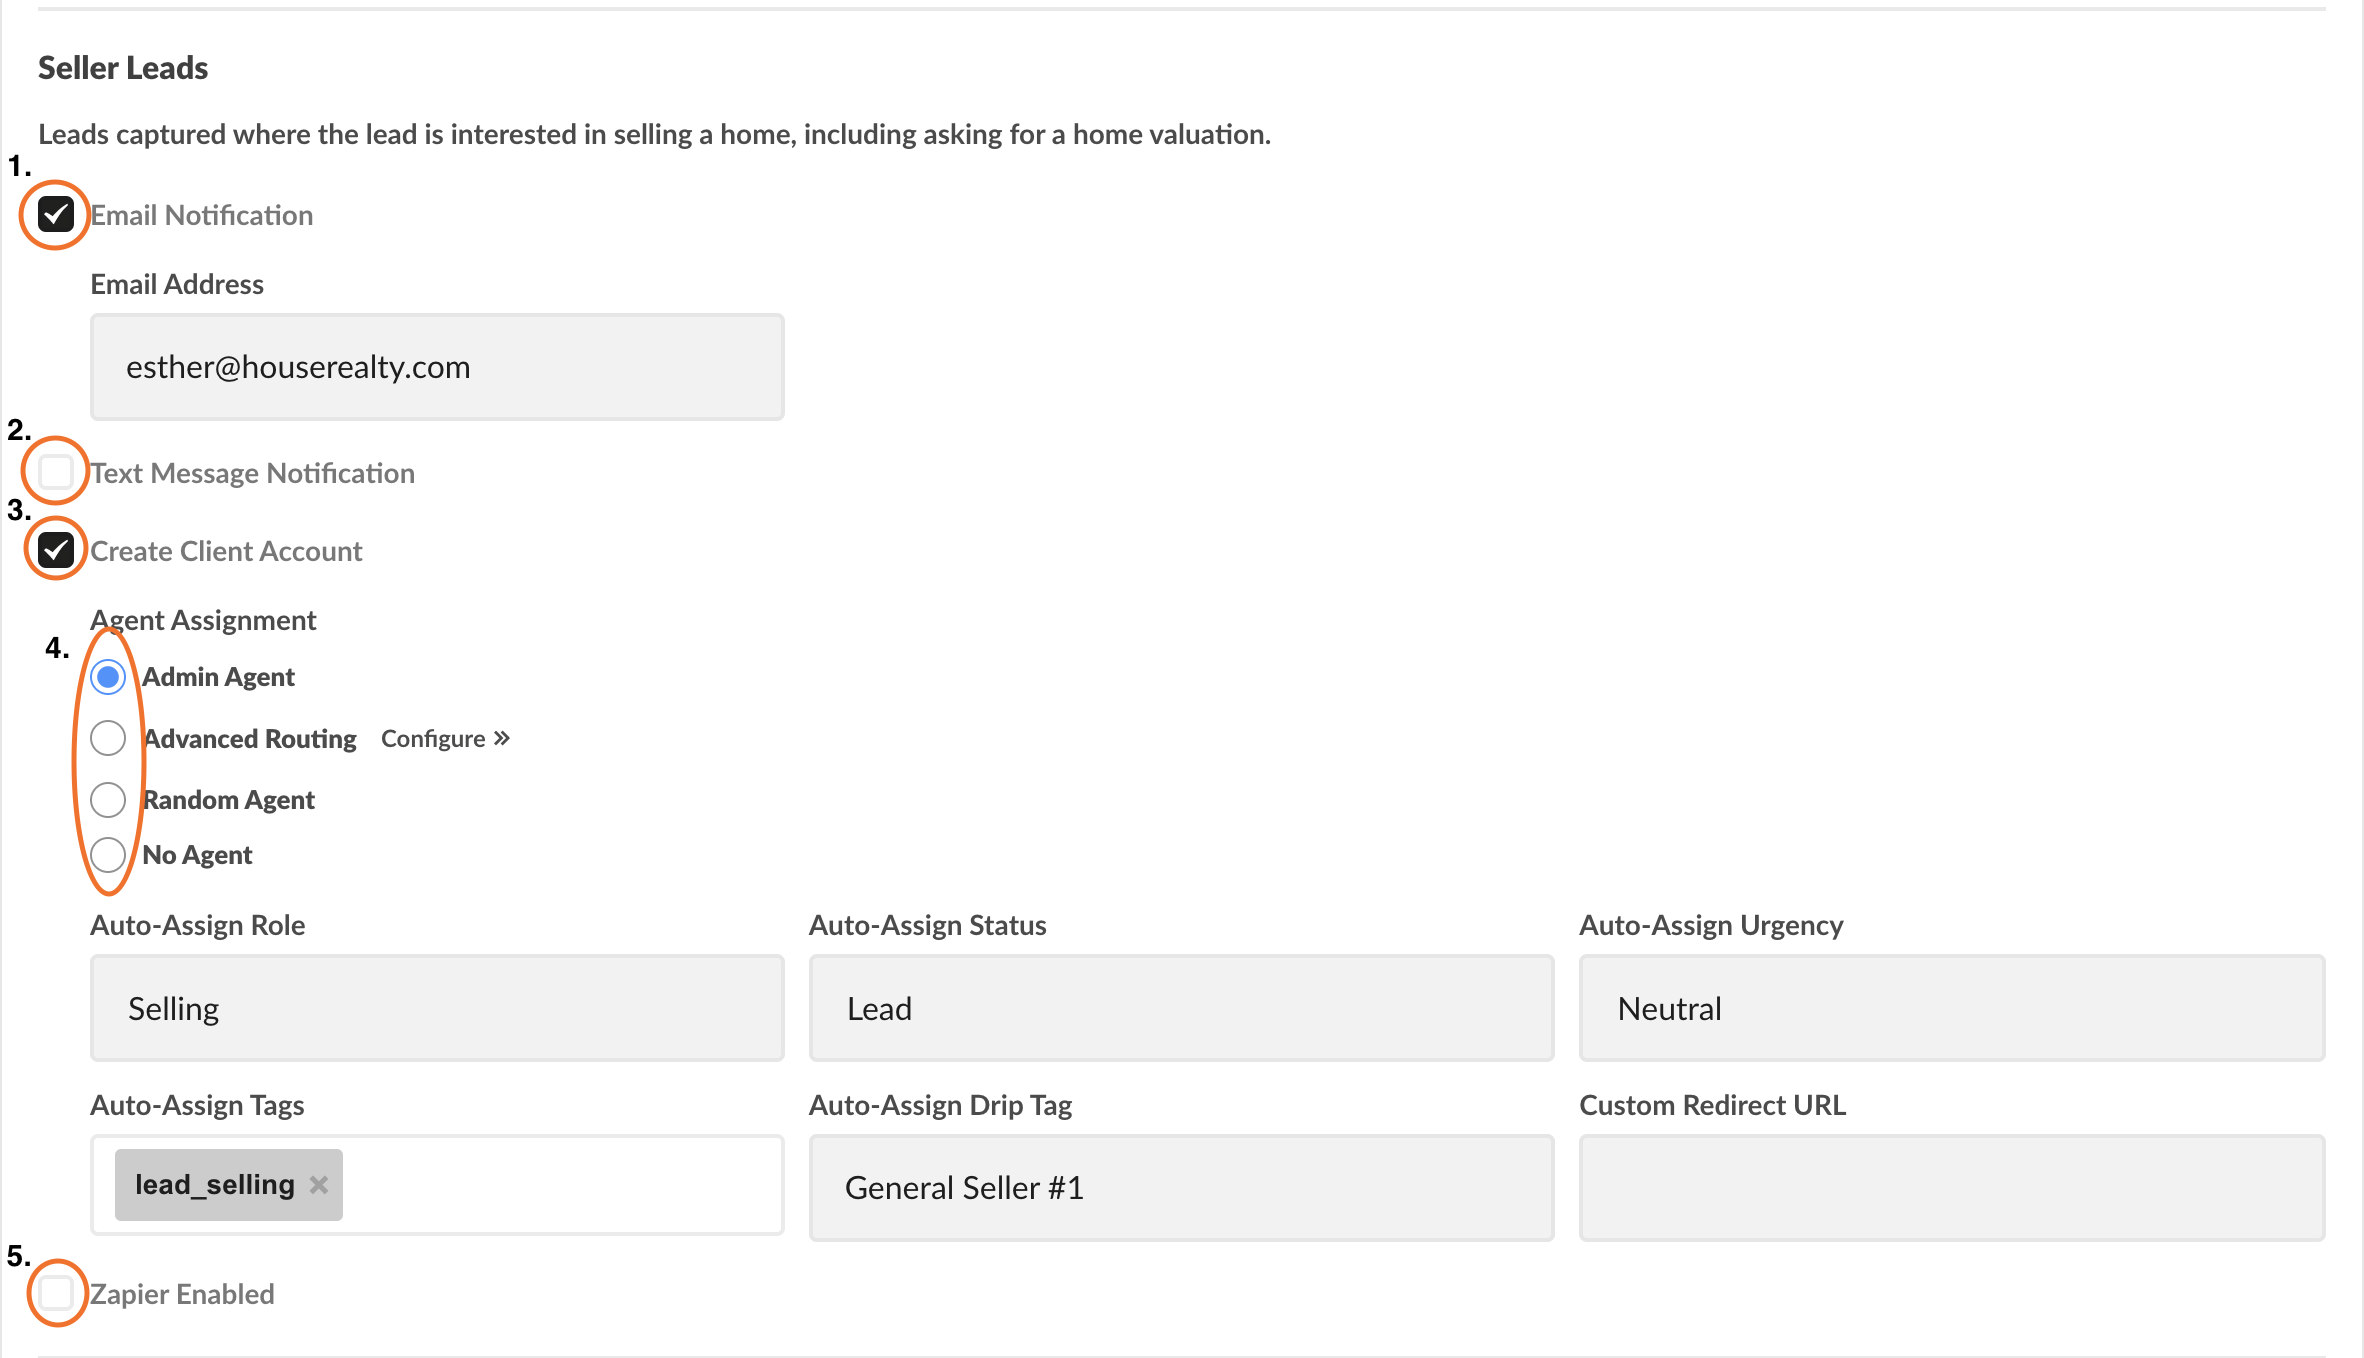
- There are six additional fields you can use to add tags and assign a role and status to any lead who comes in via this channel. We recommend setting up as many of these automatically assigned filters as you believe will be helpful, especially the Role, Status, and Tags.
- Auto-Assign Role = Select from the dropdown of potential roles, we recommend Selling
- Auto-Assign Status = Select a status to be assigned to any new lead, we recommend Lead
- Auto-Assign Urgency = Select which level of Urgency you would consider these types of leads
- Auto-Assign Tags = By default, lead_sellling will be assigned, but you can add additional tags by typing them out and pressing the Tab key on your keyboard to make your new option an official tag
- Auto-Assign Drip Tag = Scroll through your pre-made drip tags to select one for the lead to be started on immediately after they fill out a seller form
- Custom Redirect URL = Add a URL for the lead to be redirected to once they complete the form

- Scroll down to the bottom of the page and click Update
- The first option is for en email notification when a new lead comes in. We recommend having this box checked.

Comments
0 comments
Please sign in to leave a comment.